Creating your account and your free trial
What this covers
How to create a Tabledoo account for your restaurant, what the free trial gives you, and what happens immediately afterwards. You only ever do this once per restaurant.
Before you start
Have these ready:
- The name of your restaurant as you want guests to see it.
- An email address you check. Everything important is sent there, and it becomes the login for the first account.
- A credit or debit card. A card is required to start the trial, but see "About the free trial" below for what is and is not charged.
Filling in the form
Go to the Tabledoo website and choose Register, then pick the plan you want. The form asks for four things.
| Field | What to enter |
|---|---|
| Restaurant Name | Your restaurant's name, for example "The Golden Fork". Guests see this. |
| Your Name | Your own name. This becomes the name on the first staff account. |
| Property Code | A short nickname for your restaurant, used at sign-in. See below — this one matters. |
| Email Address | Your email. The password setup link and all account emails go here. |
About the Property Code
The property code is how Tabledoo knows which restaurant you are signing in to. Every member of your team types it every time they log in, alongside their email and password.
- Use lowercase letters and numbers only — no spaces, no capitals, no dashes or
other punctuation. For example
goldenfork2026. - It must be between 4 and 20 characters long.
- It cannot be changed afterwards. Choose something short, obvious and easy to say out loud, because you will be reading it to new staff for years.
It is not a password and not a secret. It is closer to a username for the restaurant as a whole. It never appears in the web address your guests use, so guests never see it.
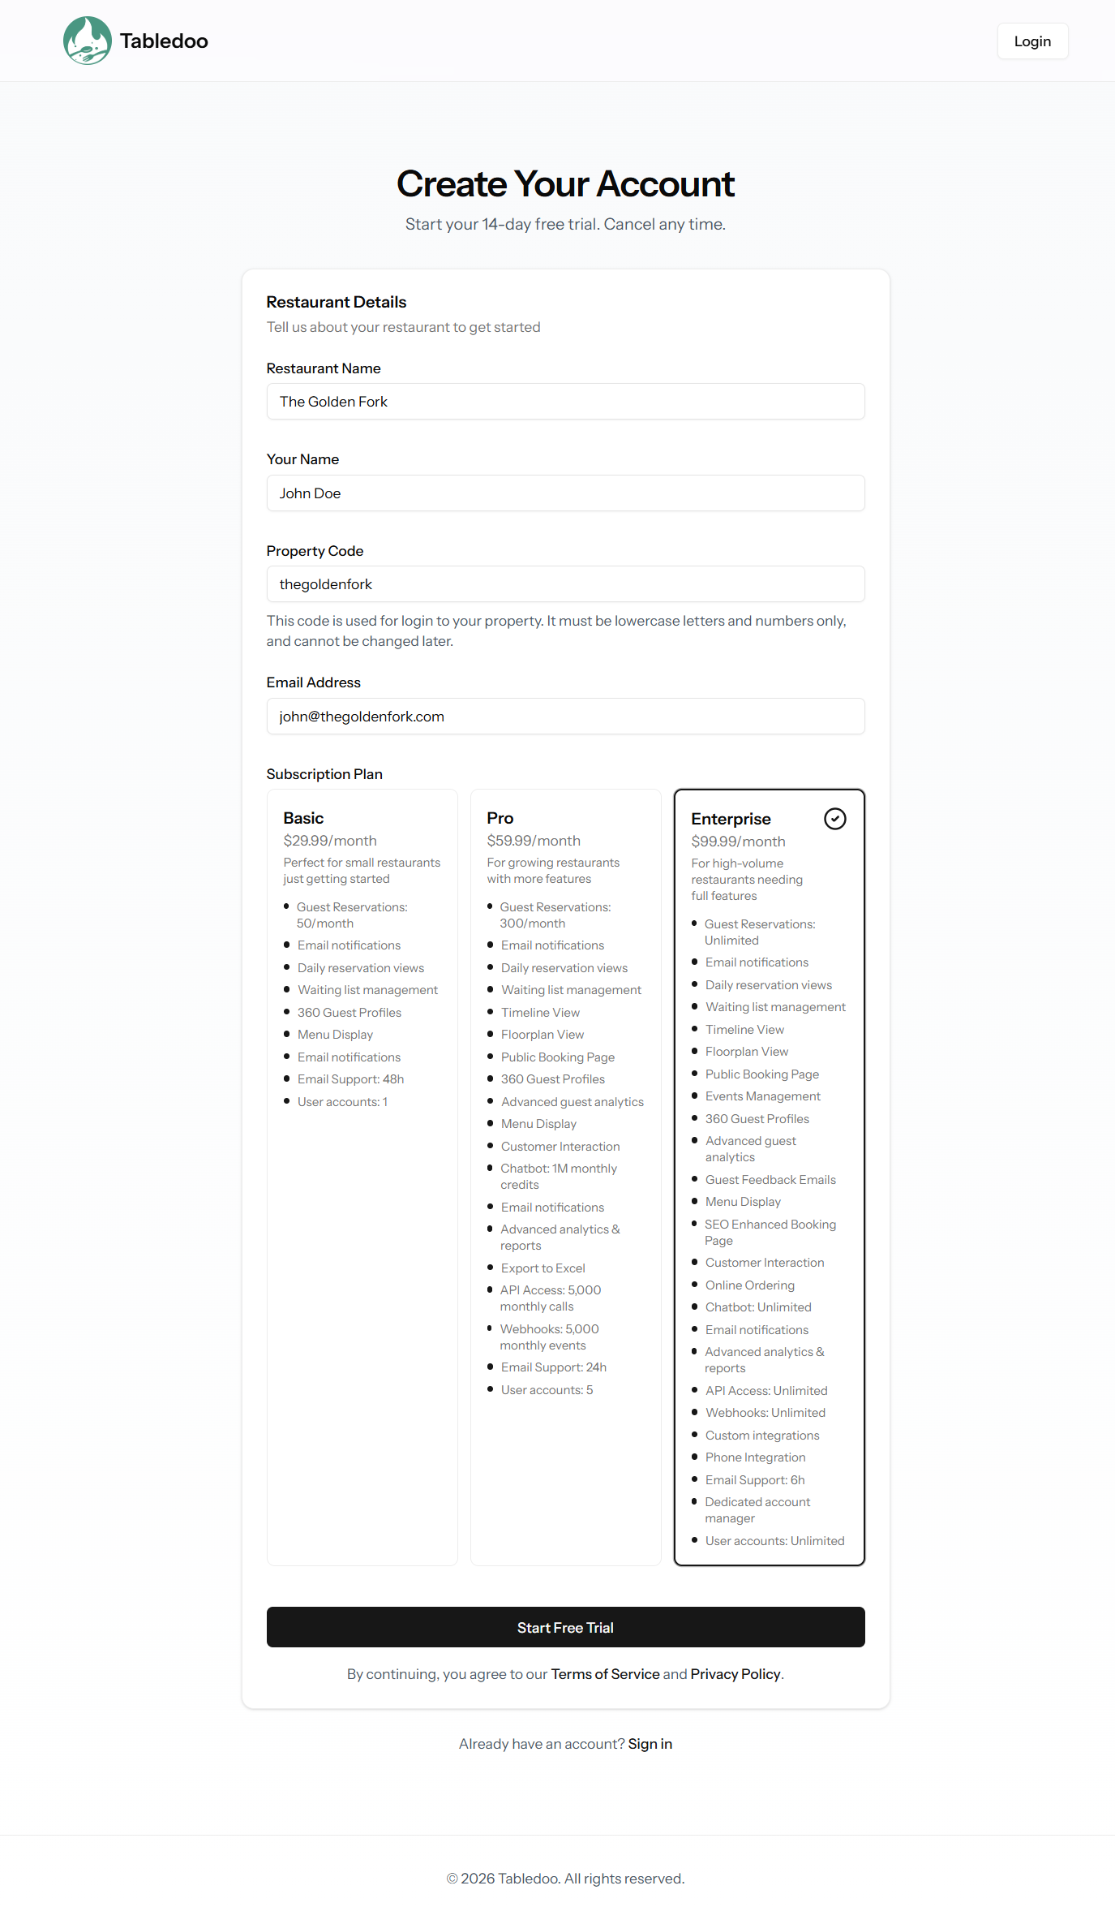
The registration form.
Paying and finishing
After the form you enter your card details. This happens on the same page, in a secure payment box provided by Stripe, the company that handles all Tabledoo payments. Tabledoo itself never sees or stores your card number.
When the payment is confirmed, your restaurant's workspace is created automatically — usually in a few seconds — and you land on a page headed Your Account Details showing your property code and email address. Write the property code down or take a screenshot.
Setting your password
You do not choose a password on the signup form. Instead:
- Check your email inbox for a message from Tabledoo.
- Click the Set Up Your Password button in that email.
- Choose a password. It must be at least 12 characters long — see Password requirements for the full rules and why they are what they are.
- Sign in with your property code, your email and your new password.
If the email has not arrived after a few minutes, check your spam or junk folder first. It is the single most common reason.
About the free trial
- The trial lasts 14 days and starts the moment you sign up.
- A card is required to start it, but you are not charged during the trial. The first payment is taken when the 14 days end.
- You get the full plan you chose during the trial — nothing is held back.
- You can change plan or cancel at any time from Property Settings → Subscription
(
/settings/subscription). If you cancel during the trial you are not charged.
Good to know
- Your currency is decided at signup based on the country you sign up from, and then stays fixed for your account. That means your bills never change currency on you. It is separate from the currency you use for guest bills and menu prices, which you set yourself in Property Settings.
- Your data is your own. Your guests, bookings and menu live in a database used only by your restaurant, and you can export your guest and booking lists to a spreadsheet at any time.
- One account per restaurant. If you run two venues, sign up twice and give each its own property code. They are kept completely separate, which is deliberate — staff at one cannot see the other.
Next
Once you can sign in, go to Your first day: a setup checklist.